
Most garage cabinets don't fail because the box was cheap. They fail because the wall behind them was never ready. I've pulled cabinet runs off garage walls that were held up by drywall anchors, and I've pulled runs off walls where the base sat on a floor that pitched half an inch across eight feet, so the doors never lined up and the homeowner blamed the cabinet company.
Garage cabinet system installation is a wall and floor job first and a cabinet job second. Find the studs, level the base, tie the whole run together, and a mid-priced kit will outlast the truck parked next to it. Skip those steps and the most expensive kit on the market will sag, rack, and pull out of the drywall.
This is the order I do it in, plus the two kits I'd actually put in a working two-car garage.
Why you should trust me
I've been a general contractor in Columbus, Ohio for 20 years, and a good chunk of that work has been garages: framing them, wiring them, insulating them, and then coming back a year later to hang cabinets in them. I've organized more garages than most people have parked in. I built my own wall system out of plywood and anger once, watched it sag under a full tool chest, and replaced it with the real stuff.
I test storage the way a contractor actually loads it: a full tool chest, two bikes, the mower, the trimmer, and the 17 boxes my wife keeps asking me to deal with. I don't trust a shelf that only ever held a box of Christmas lights. And I don't trust a weight rating printed on the outside of a box when the bracket inside is thinner than the box.
How I judge a garage cabinet kit
I'm not going to hand you a spec sheet and call it a review. Here is what actually separates a kit that survives a working garage from one that becomes expensive shelving.
Steel over resin. For anything you plan to stack tools in, steel cabinets are the only honest answer. Resin is fine for a beach towel and a pool noodle. It is not fine for a circular saw, a box of nails, and a gallon of deck sealer on the same shelf.
Floor-standing base, not wall-hung everything. A base cabinet sitting on the slab transfers its load straight down to concrete. A cabinet hanging on a stud wall transfers everything into two or three lags. That's the whole difference between a system that lasts and one that pulls a hole in your drywall.
The mounting hardware matters more than the cabinet. Bolts into studs, not anchors into drywall. Ever. A lag bolt into a real stud is doing the work. Everything else is decoration.
Can you reconfigure it later? A garage system you can't rearrange is just expensive shelving. Bikes get bigger. Kids get bigger. The mower gets replaced by a snowblower. If the cabinets can't be unbolted and moved, you bought furniture, not storage.
Leveling feet or a shim plan. Garage slabs pitch toward the door on purpose, so water runs out. That means your cabinets will not sit level unless you plan for it, and unlevel base cabinets mean doors that never close right.
The worktop. This is the surface you'll actually work on. A channeled top keeps screws and sockets from rolling onto the floor. A flat top looks cleaner and costs less. Neither is wrong, but know which one you want before you order.
Find the studs before you spend a dollar
This is the step everybody skips, and it's the step that decides everything downstream.
Step one: Find the studs by sound and confirm with a stud finder. Run a strong magnet along the wall for the drywall screws, then verify with an electronic finder, then verify again with a thin finish nail. Two of those three agreeing is what I trust. One of them alone is a guess.
Step two: Mark both edges of every stud in pencil and tape over the marks. You will lose pencil marks behind cabinet backs if you don't tape them.
Step three: Check the ceiling joists if you're adding overhead storage. Overhead is free real estate until the ceiling sags. The joists have to be real and the hardware has to match the load, or you skip the overhead rack entirely.
Step four: Check the floor pitch with a four-foot level. Note where the high spot is. That's where the base cabinets get shimmed.
Step five: Measure for door swing and clearance. Count the garage door track travel, the water heater, the electrical panel, and the outlet locations. Cabinets that block the panel are a code problem, not a storage problem.
Step six: Measure your ceiling height. A tall wall cabinet plus a worktop is taller than you think, and a door that hits the garage door track is a cabinet you'll hate.
The two kits I'd put in this garage
Both of these are floor-and-wall systems, which is what you want. One is the kit I'd put in a normal two-car garage with a workbench and a pegboard. The other is the kit I'd put in a garage where storage is the point and the budget follows the storage.
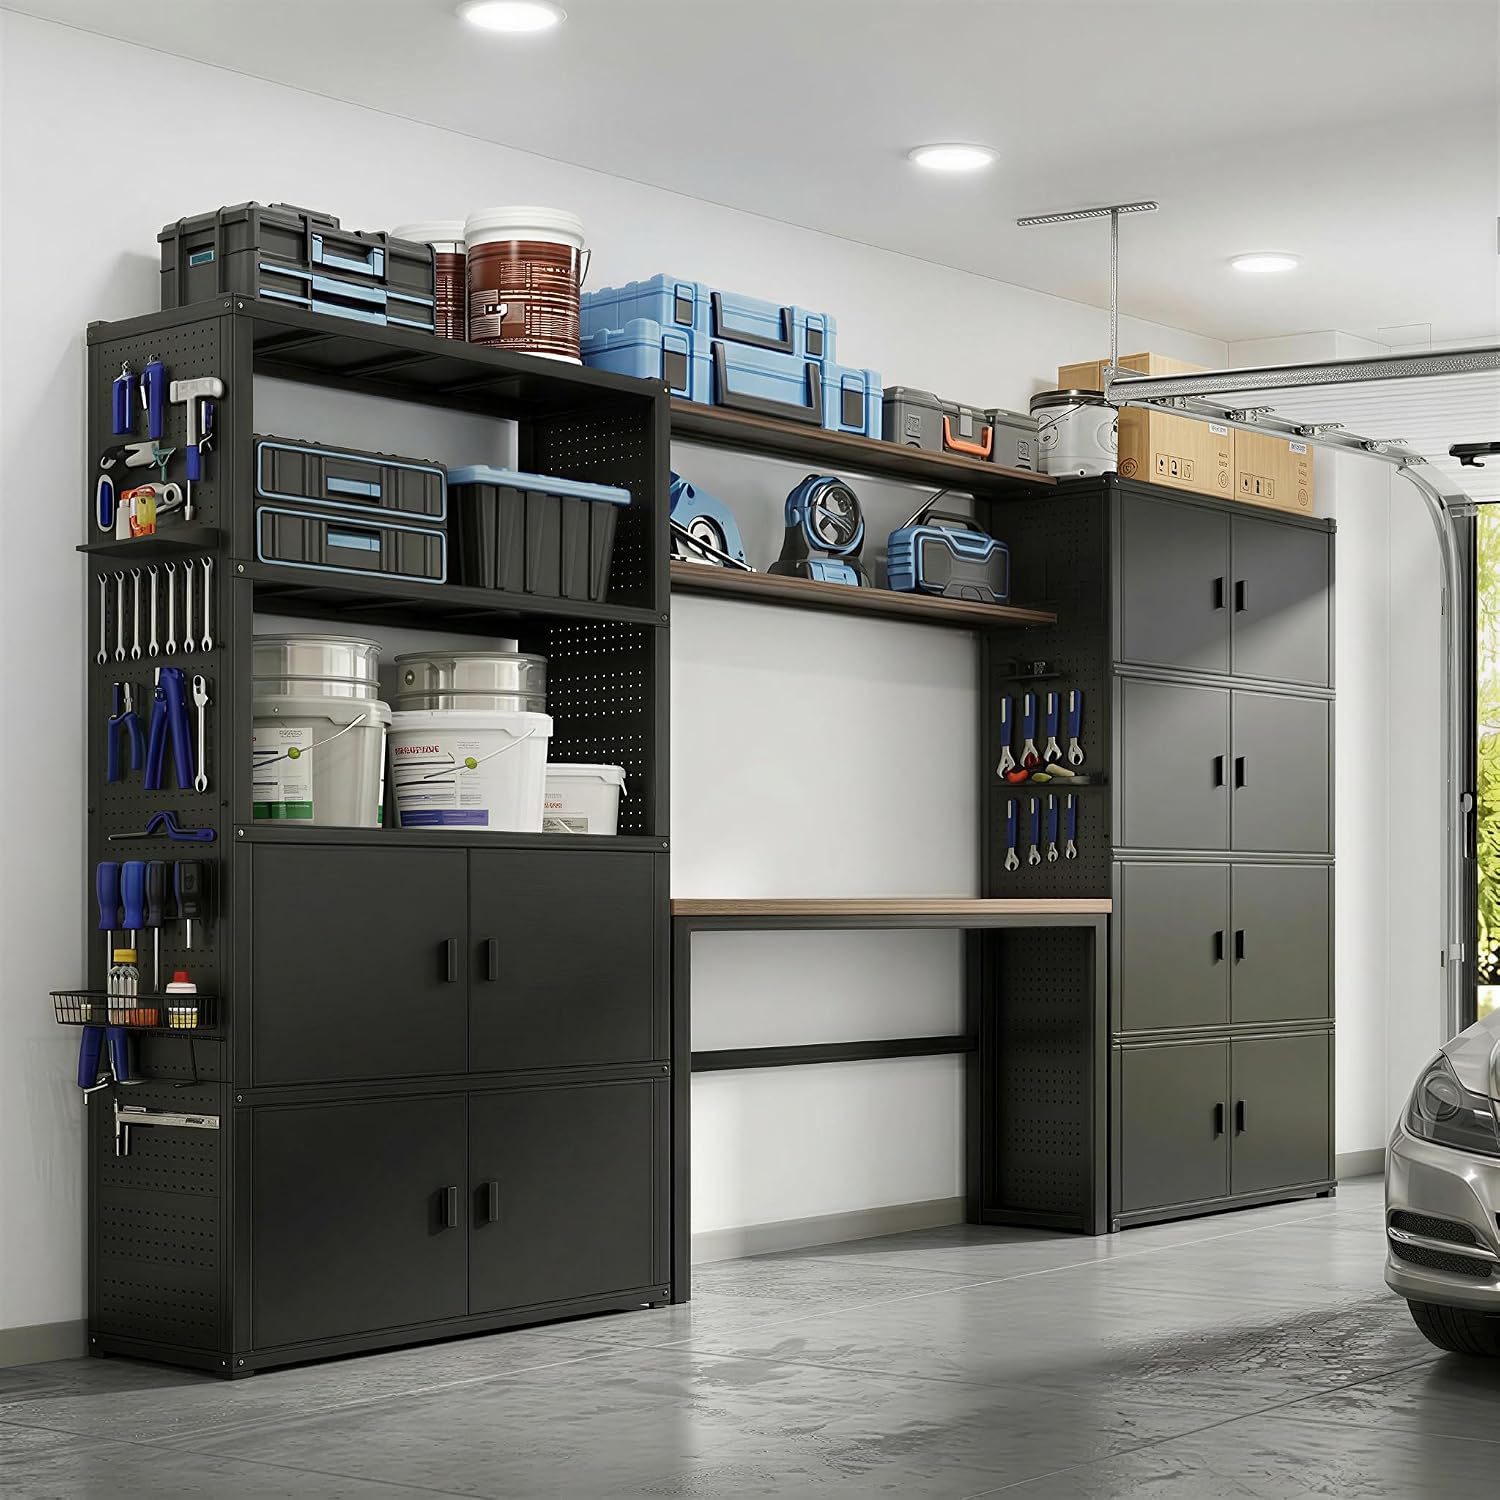
The practical pick: FLEXIMOUNTS Garage Storage Cabinet System with Workbench & Pegboard, White
 Visit on Amazon →
This is the kit that turns a wall into a workbench in one order. The pegboard is the part that earns its keep, because it moves the hand tools off the worktop and onto the wall where you can see them. A workbench with nothing on it is a workbench you can actually use, and that's rarer than it should be.
The white finish is a decision, not a detail. It bounces light around a garage that usually has one dim bulb in the ceiling, and it makes a small garage feel less like a cave. It also shows every scuff, every sawdust smear, and every greasy handprint. If you work on cars, you'll be wiping this down more than you'd like.
Flaws but not dealbreakers: The pegboard is where people overspend. Buy standard hooks and bins and keep it simple instead of chasing every specialty accessory. And like every kit in this category, the wall anchoring is on you. Use real lag bolts into the studs you marked, not whatever is in the bag.
Anyone with a two-car garage, a modest tool collection, and a bench that currently holds nothing but clutter should start here.
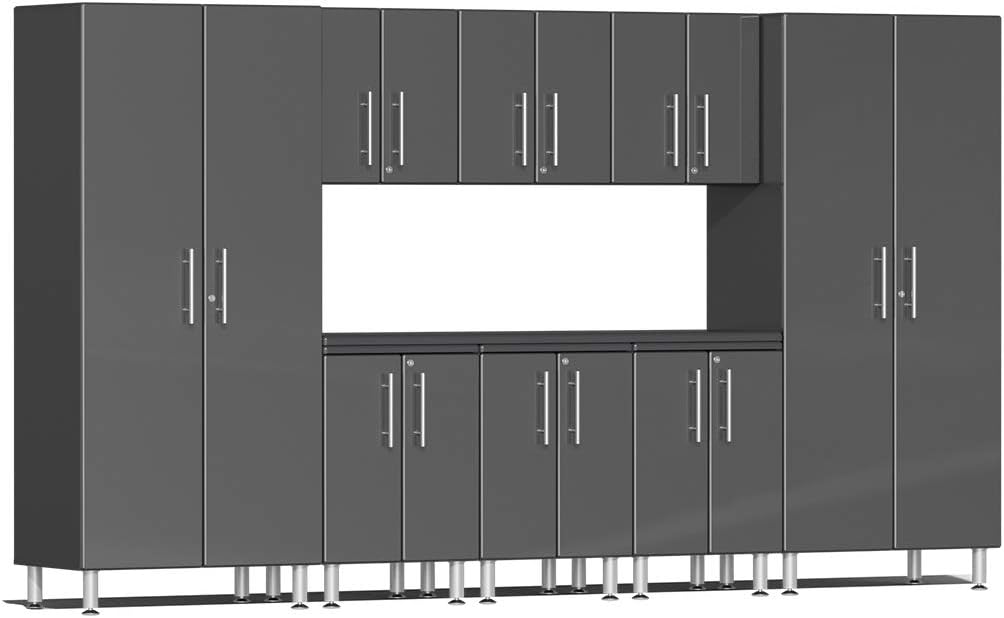
The upgrade pick: Ulti-MATE UG23091G 9-Piece Garage Cabinet Kit with Channeled Worktop in Graphite Grey Metallic
 Visit on Amazon →
Nine pieces is a whole wall, not a corner. This is the kit for the garage where the storage is the reason you're doing the project, and it brings the taller cabinets and the closed uppers that let you put paint, chemicals, and seasonal boxes behind doors instead of on open shelves collecting sawdust.
The channeled worktop is the detail I appreciate most. Channels catch the socket that rolls off, and in a garage with a pitched floor, everything rolls. The graphite grey metallic finish hides dust and fingerprints far better than white, which means it looks the same in month six as it did in week one.
Flaws but not dealbreakers: More pieces means more layout decisions before you assemble anything. Lay the whole run out on the floor first, in the order it will live on the wall, and mark stud locations on the wall before you build. Also budget for a second set of hands, because tall assembled cabinets are awkward to lift and set.
Anyone building out a full garage wall, with a real budget and a plan to stay in the house, should look here first.
Install it in the right order
Order of operations is where most DIY cabinet installs go wrong. Do these in sequence and the job takes two weekends. Do them out of order and it takes three.
Step one: Snap a level line for the top of your wall cabinets. Measure down from the ceiling, not up from the floor, because the floor is the thing that lies.
Step two: Shim and level the base cabinets front to back. This is the pitch problem. Set the base where it lives, check with a level, and shim the low side until the cabinet is level in both directions. Then anchor the base into the studs. Do not anchor first and shim second.
Step three: Bolt the base cabinets to each other. A run of three cabinets bolted together is one rigid unit. Three separate cabinets are three things that can each move.
Step four: Set the worktop and check the overhang. Even overhang front and back, and check that the front edge doesn't foul a door swing.
Step five: Install a ledger board for the wall cabinets. A straight board screwed into every stud at your level line gives you something to set the uppers on and hold them while you drive the lags. This one step turns a two-person job into a manageable one.
Step six: Lag the wall cabinets into the studs, then bolt them to each other. Same logic as the base. One unit, not five.
Step seven: Bolt the uppers to the base run where the design allows. Tying the top and bottom together is what stops the whole wall from racking when someone leans on the workbench.
Step eight: Load from the bottom up. Heavy on the bottom shelf, light and seasonal up top. The top shelf of a wall cabinet is for things you touch twice a year, not for the tool chest.
Layout rules so you don't reorganize in six months
Put the stuff you use weekly at eye level. That's the whole system, and everything else is detail.
Heavy items go low, in base cabinets, because lifting a mower battery off a high shelf is how people get hurt. Seasonal items go up top, where reaching is annoying but infrequent. The pegboard sits directly over the workbench, within arm's reach of where you'll be standing when you need a screwdriver. Chemicals and paint go in a closed cabinet with a door, not on an open shelf where sawdust and sunlight get at them.
Leave yourself at least a few feet of clear floor in front of the run, and keep the workbench clear of the garage door's travel path. And leave one empty shelf in the whole system. You'll fill it within a year, and if you don't, you'll have a place to put something without reorganizing everything else.
What this costs
The two kits sit in different leagues. Check current Amazon price on each before you decide, because the gap between them is real and it buys you more pieces, taller cabinets, and the channeled top.
The part people forget to budget is the hardware and the shims. Lag bolts, washers, a ledger board, a handful of composite shims, and a tube of construction adhesive cost a fraction of the cabinets and are the difference between a system that holds and a system that pulls out of the wall. Buy them on the same trip as the cabinets, not after you've already started.
The other hidden cost is time. This is a two-weekend job, minimum. One weekend for the wall prep, layout, and base. One weekend for the uppers, the worktop, and loading it back in. Anyone promising you a garage in a weekend is selling you a wire rack and a lie.
What I didn't pick and why
Open wire shelving is cheap and it works for light, bulky stuff, but it collects dust, nothing stacks on it, and small parts fall right through. It's not a cabinet replacement.
Resin and plastic cabinets are fine in a shed. In a garage with temperature swings and real tool weight, they flex, and flexing cabinets mean doors that stop closing.
Wall-hung-only systems look clean and save floor space, and if you have a specific reason to keep the floor clear, they can be the right call. But every pound in that system is hanging on your studs and your lags, and the mounting hardware becomes the weak point. If you're loading a tool chest, get a base cabinet that sits on the slab.
The bottom line
Garage cabinet system installation rewards patience in the first two hours and punishes shortcuts for the next ten years. Find the studs, level the base, tie the run together, and load it from the bottom up. The cabinets you choose matter, but the wall work matters more.
Do the wall right, and either of these kits will hold your tools, your paint, and your wife's 17 boxes without a sag in sight.